Cabin air filters are an often-overlooked part of your vehicle. Any vehicle is an ever-changing piece of equipment with parts that must be maintained.
- 5 Life Hacks for Your Vehicle
- DIY Spring Tune Up with GM Parts – Part 4: Air Filter & Windshield Wipers
Because cabin air filters are not commonly understood, it’s good to know the importance they play in eliminating air pollutants. It’s also essential to know the warning signs that tell you it’s time to change your filter.
What is a cabin air filter?
Cabin air filters kill pollutants in your vehicle. Found behind your glove compartment or under the hood (depending on the model), your cabin air filter is essential in keeping your passengers safe from pollutants and debris.
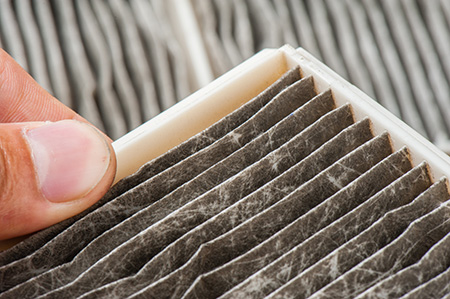
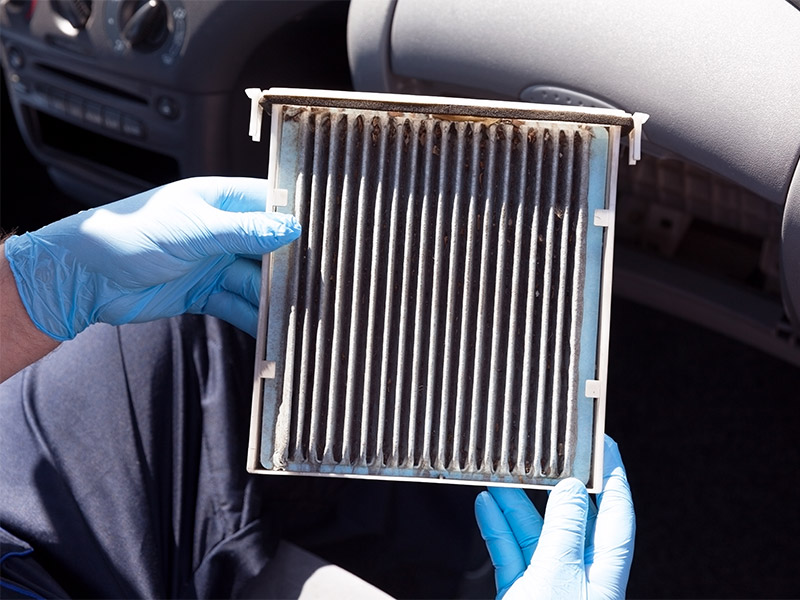
Unfortunately, these filters can become less effective over time: dirtied by dust, pollen, charcoal and other particles in the air. This can be dangerous to asthmatic drivers or drivers with allergies, but these particles are also unhealthy for anyone.
When should I replace the filter?
How can you tell if your cabin air filter needs to be replaced? For the most part, your answer is based on odor and air flow. If your vehicle’s air conditioning and heating system aren’t functioning properly, and it smells stale, then you’re likely due to replace your cabin air filter. You should look to replace it once every twelve months, or every 12,000 to 25,000 miles (depending on where you’re driving with regards to air pollution or heavy dust).
Replacing the filter is a relatively simple job, one you could even do yourself, but those less comfortable with repairing their own vehicle can have their filter replaced at an auto repair shop or dealership. There are a few simple steps to replacing your cabin air filter:
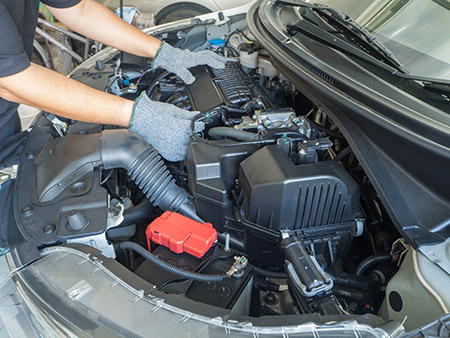
Finding the cabin air filter
Not every vehicle features a cabin air filter. They were first introduced in the year 2000 and are now included in most modern vehicles, so keep that in mind if you own an older model. Your service manual will tell you if you have a cabin air filter, and where you can find it. If you have a cabin air filter, then you’ll be happy to know that it takes mere minutes to replace.
It’s always a good idea to record when you’ve changed an air filter. Write down the day you’ve replaced it and check it from time to time. That way, you won’t forget to replace the it. It’s well worth it, for the sake of your health.
Replacing the cabin air filter
Remove the current filter by unfastening anything keeping the cover in place. This could mean unscrewing it from the housing, so you may need some tools depending on your vehicle. It may be wise to consult the service manual, or even to take pictures of the housing as you remove the cover. Should the process be complicated, you would then know where to place everything again.
With the cover out of the way, you should be able to remove the cabin air filter easily. Check the filter’s colour and clean the housing compartment. Is it grey, full of insects, dirt and grime? You may or may not want to change your filter, though you should definitely clean the housing compartment with a rag or vacuum. Consider changing your filter in the near future if it looks clean enough for a few more trips.
Once clean, place the new filter inside the housing. Ensure the filter is installed correctly (with the direction of air flow) and put the cover back on. Doing so is as simple as putting everything back together, the way you had found it.
Leave a Reply